LearnPress 및 Uncanny Automator로 교실 자동화
게시 됨: 2023-01-06우리는 교실에서 가장 발전된 기술이 각도기였던 때를 기억할 만큼 나이가 들었습니다. 예, 당신은 그 권리를 읽었습니다. 탄소 데이트하지 마십시오.
고맙게도 교실 기술은 그 이후로 먼 길을 왔습니다. LearnPress와 같은 학습 관리 시스템(LMS)을 사용하면 교육에 훨씬 더 많은 시간을 할애하고 오버헤드 프로젝터를 사용하는 시간을 줄일 수 있습니다. 그러나 당신이 정말로 원한다면
21세기 교실에서는 LMS를 Uncanny Automator 와 같은 e-러닝 자동화 도구와 페어링해야 합니다.
이 빠른 가이드에서는 Uncanny Automator가 학생과 교직원의 우선 순위를 정할 수 있도록 학업 관리를 자동 조종하는 방법을 보여줍니다. 과정 등록을 기반으로 CRM에서 학생을 자동으로 태그하거나 직원의 과정 진행 상황을 데이터베이스에 자동으로 기록하여 규정을 준수합니다. Automator를 사용하면 이 모든 것을 할 수 있고 훨씬 더 많은 일을 할 수 있습니다.
이제 나선형 공책을 버리고 2B 연필을 반으로 쪼개십시오. 수업이 진행 중입니다.
목차
런프레스란?
그것에 대해 모르는 사람들을 위해 LearnPress는 우리 ThimPress 가 만든 훌륭한 LMS WordPress 플러그인입니다. 처음부터 LearnPress는 무료로 다운로드할 수 있으며 누구나 이 플러그인을 활용하여 LMS 사이트를 구축할 수 있습니다. 1개의 플러그인 자체가 많은 것을 할 수 없다는 것을 이해하고 무료 및 유료 LearnPress 애드온을 모두 제공합니다.

여기에서 프리미엄 애드온을 매우 고정된 가격으로 팩으로 구입할 수 있습니다.
- LearnPress 프로 번들
- LearnPress 세미 프로 번들
- LearnPress용 WPML 애드온
이 플러그인을 다운로드하여 웹에 설치하면 교육 사이트 구축 및 편집을 시작할 수 있습니다. 파이처럼 쉽게!
언캐니 오토메이터란?
Uncanny Automator (일명 세계 최고의 교사 조수)는 최초의 WordPress 자동화 플러그인 입니다. 그리고 그 기능을 한 눈에 보면 그 이유를 쉽게 알 수 있습니다. 100개 이상의 통합(계산 중)을 통해 좋아하는 모든 앱과 플러그인을 연결하고, 반복적인 워크플로를 자동화하고, 판매 경로를 개선하고, 시간과 비용을 절약할 수 있습니다.

Uncanny Automator에는 무료 버전에 포함된 LMS 및 기타 플러그인에 대한 많은 트리거 및 작업이 포함되어 있으므로 위험 부담이 없습니다(무료). 그리고 Automator에 무료 계정을 등록하는 것을 잊지 마십시오. 가입만 해도 1,000크레딧을 받을 수 있으므로 GoTo Training, Slack 및 Zoom과 같은 프리미엄 통합을 사용해 볼 수 있습니다.
이 e-러닝 자동화 도구는 복사기보다 훨씬 더 발전된 도구임을 알게 될 것입니다. 그러나 노코드 보장으로 훨씬 사용하기 쉽고 재밍 가능성이 훨씬 적습니다.
따라서 무료 플러그인을 다운로드하고 계정을 등록한 후 다음 섹션으로 이동하여 Uncanny Automator가 교실에서 최고의 기술인 이유를 직접 확인하십시오.
Uncanny Automator로 LearnPress 웹사이트를 자동화하는 방법
이것은 LearnPress 웹 사이트에서 Uncanny Automator를 사용하여 작업량을 줄이고 많은 시간을 절약할 수 있는 몇 가지 방법입니다.
Uncanny Automator를 사용하여 LearnPress를 CRM에 연결
과정 등록을 기반으로 CRM에서 학생에게 자동 태그를 지정하는 것은 학생들에게 예정된 퀴즈 및 시험을 상기시키고 과정 콘텐츠 업데이트를 알리고 고유한 제안을 확장하는 가장 좋은 방법입니다.
LearnPress를 Groundhogg에 연결하는 방법을 보여드리지만 ActiveCampaign 또는 MailPoet과 같은 다른 CRM으로 이 레시피를 복제할 수 있습니다.
1단계: 새 레시피 만들기
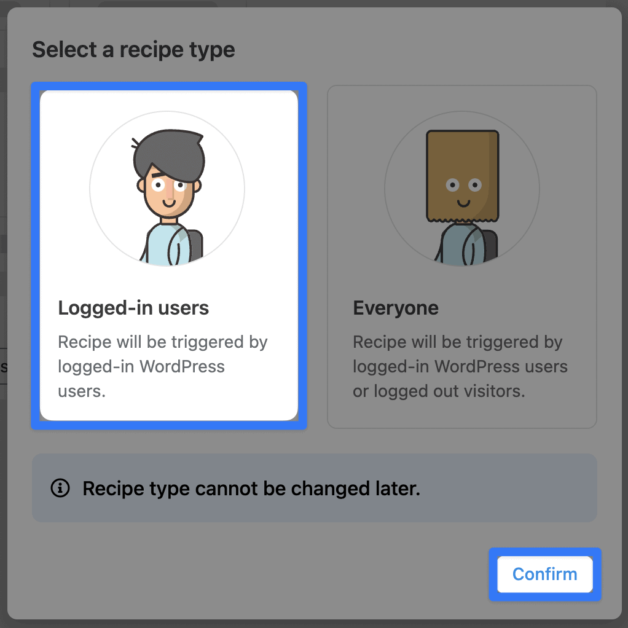
WordPress 관리자 사이드바에서 Automator > 새로 추가로 이동합니다. 표시되는 팝업 창에서 로그인한 사용자를 선택합니다.
2단계: 레시피 이름 지정
전자 학습 자동화를 너무 좋아하게 되어 수십 가지(또는 수백 가지)의 레시피를 만들게 될 것입니다. 따라서 한 눈에 쉽게 식별할 수 있도록 레시피에 대한 명명 규칙을 제시하는 것이 좋습니다. 을 위한
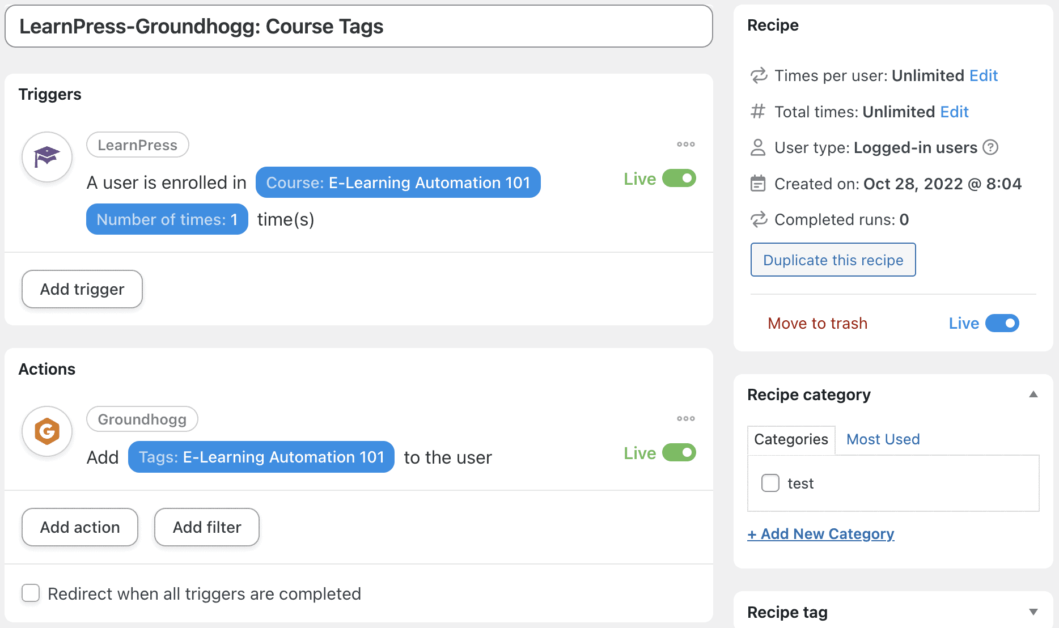
예를 들어, 관련된 통합으로 인해 이 레시피 이름을 LearnPress-Groundhogg: Course Tags 로 지정했습니다.
3단계: 트리거 구성
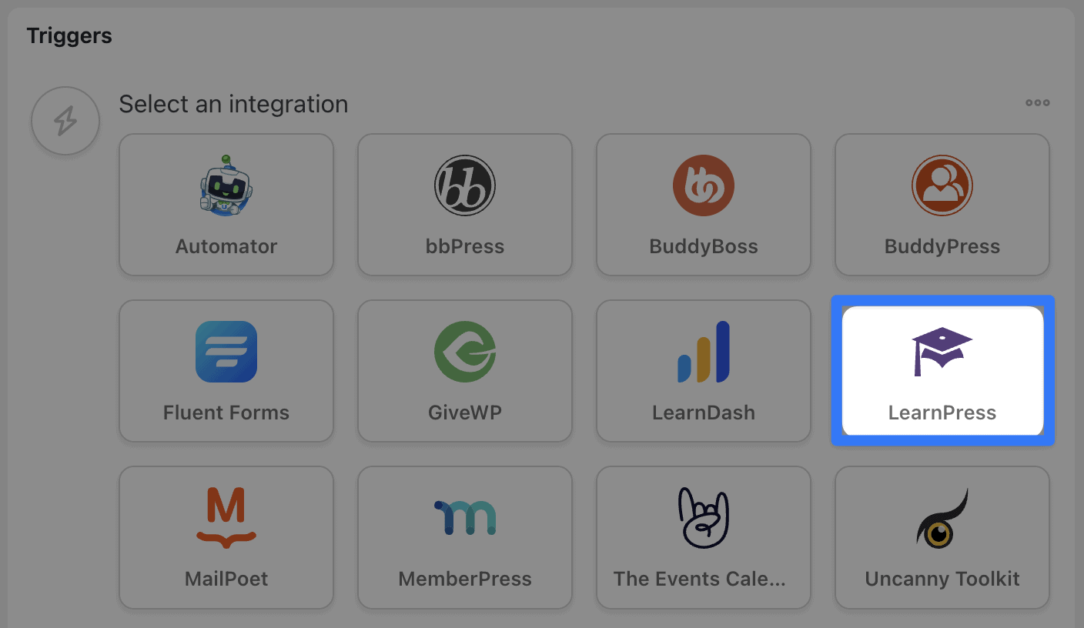
트리거 패널에서 LearnPress 를 클릭합니다.
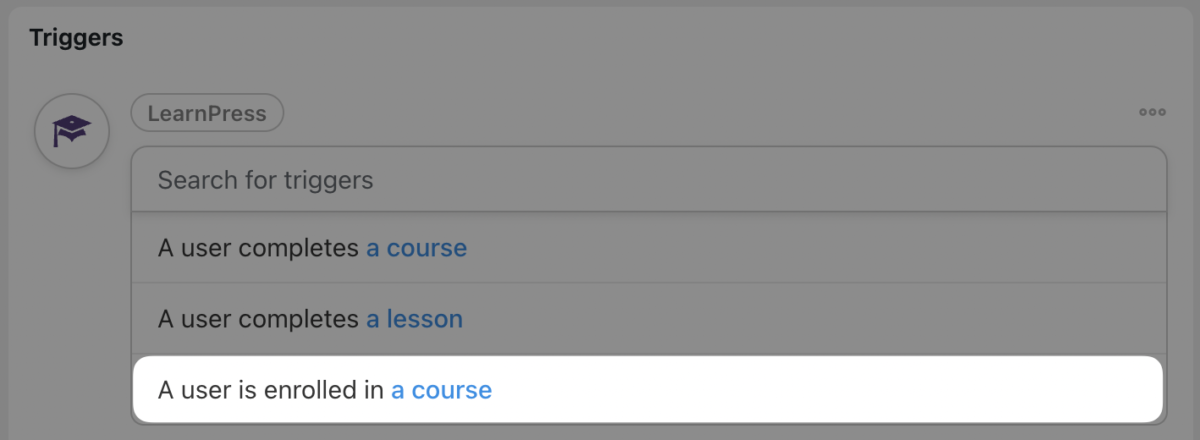
표시되는 드롭다운 목록에서 A user is registered in a course 를 선택합니다.
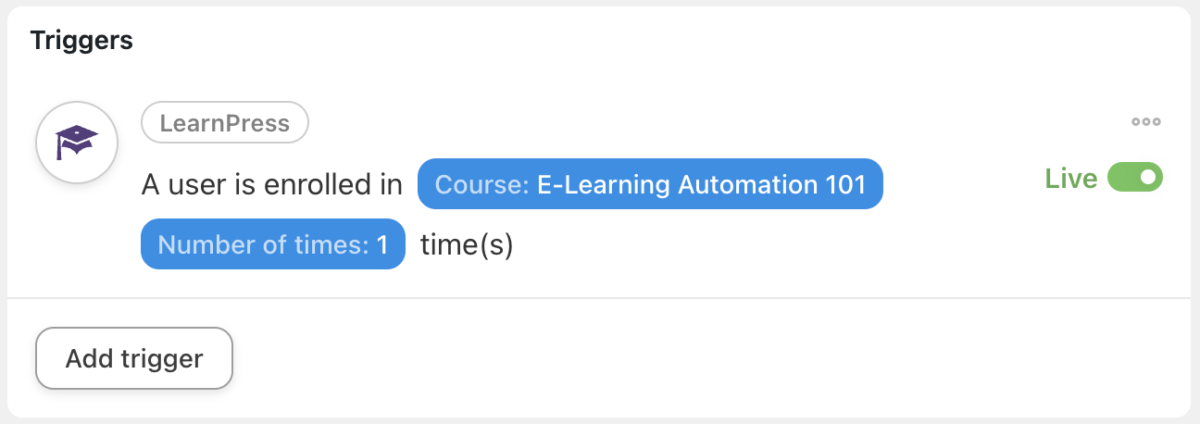
Automator는 코스를 선택하라는 메시지를 표시합니다. 우리는 E-Learning Automation 101 과정을 선택했습니다.
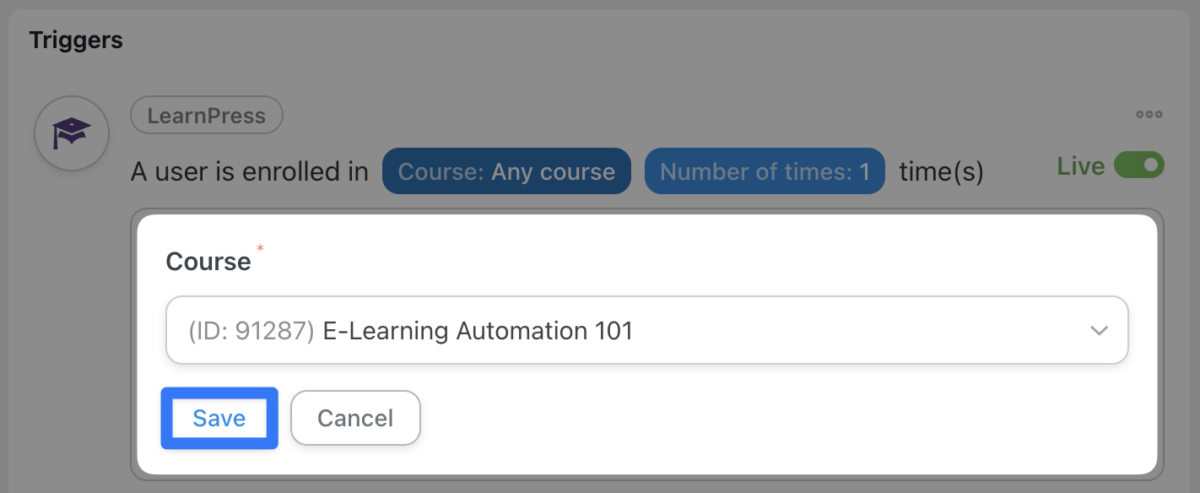
과정을 선택한 후 저장 을 클릭합니다. 트리거는 다음과 같아야 합니다.
4단계: 작업 구성
액션 패널에서 액션 추가 를 클릭합니다. 사용 가능한 통합 메뉴에서 Groundhogg 또는 원하는 CRM을 클릭합니다.
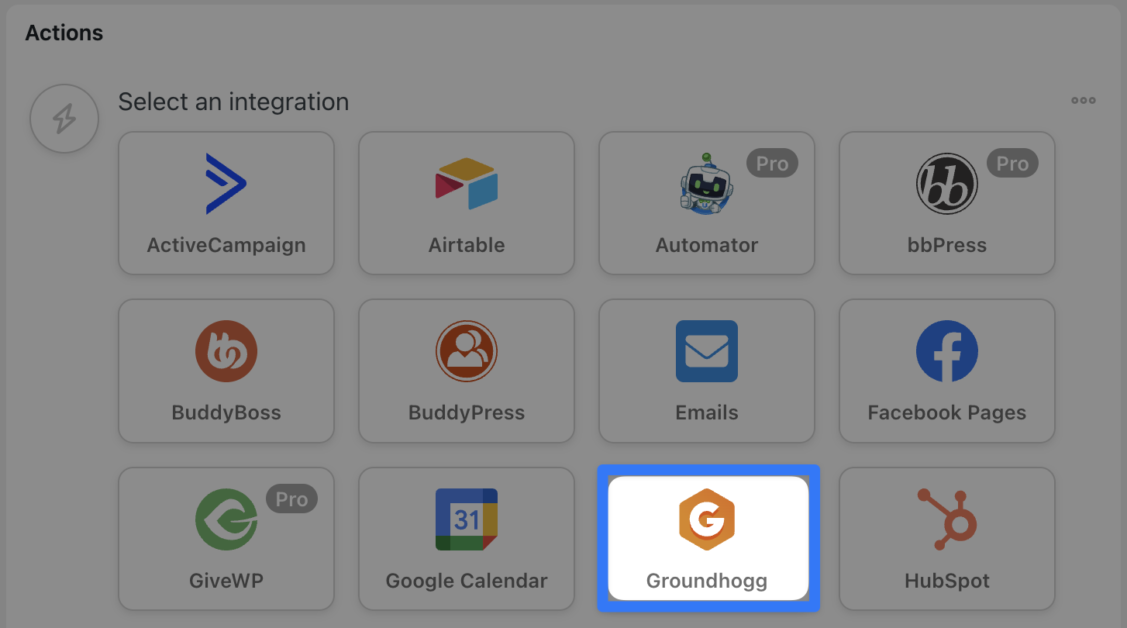
드롭다운 목록 에서 사용자에게 태그 추가를 선택합니다.

Automator는 태그를 선택하라는 메시지를 표시합니다. 올바른 태그를 선택한 후 저장 을 클릭합니다.


5단계: 라이브 및 학습(누르기)!
믿거나 말거나, 그게 다야! Automator 레시피를 만드는 방법을 배우는 것이 LSAT를 공부하는 것보다 훨씬 쉽습니다.
남은 일은 레시피를 Draft에서 Live로 전환하고 학습을 시작하는 것뿐입니다!
Uncanny Automator를 사용하여 LearnPress를 Google 스프레드시트에 연결
운영을 원활하게 실행하려면 규정 준수가 핵심이며 자동화도 마찬가지입니다. 규정을 준수하도록 LearnPress를 Google 스프레드시트 직원 디렉토리에 연결하는 방법을 알려드리겠습니다.
참고: Google 스프레드시트는 Automator의 프리미엄 통합 기능 중 하나이므로 토큰이 충분한지 확인하거나 Automator Pro 로 업그레이드하십시오.
1단계: Automator를 Google 스프레드시트에 연결
WordPress 관리자 사이드바에서 Automator > 설정 으로 이동합니다. 프리미엄 통합 을 클릭한 다음 Google 스프레드시트 를 클릭합니다. 화면 하단 에서 Google로 로그인 을 클릭합니다.
Uncanny Automator는 연결하려는 Google 계정을 선택하라는 메시지를 표시합니다.
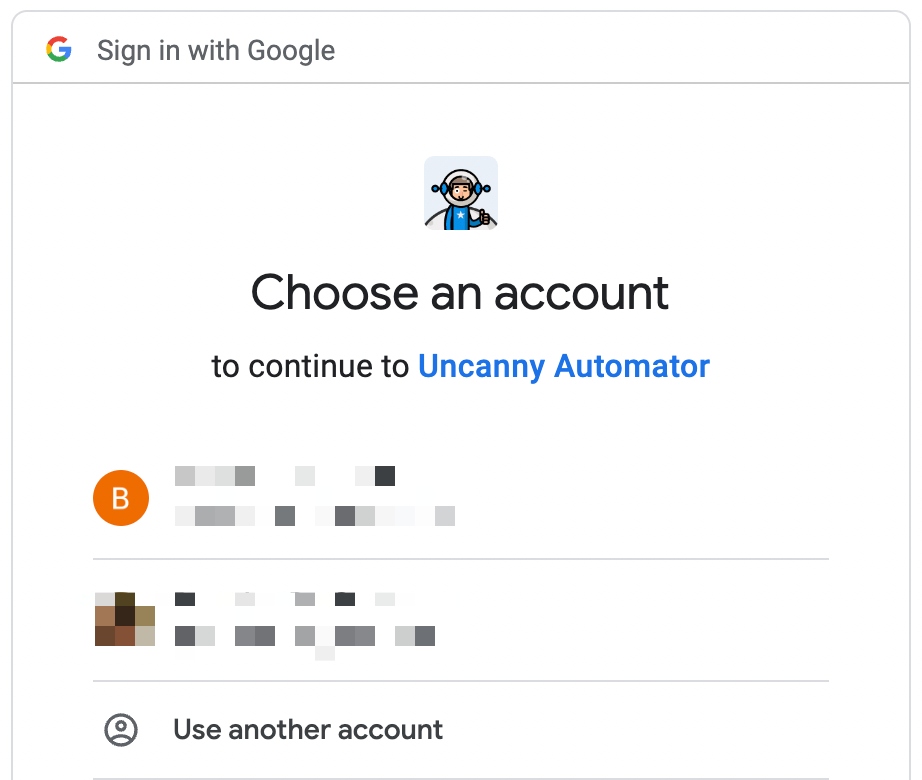
안내에 따라 Google 계정을 연결하세요.
2단계: 새 레시피 만들기
WordPress 관리 사이드바에서 Automator > 새로 추가 로 이동합니다. 표시되는 팝업 창에서 로그인한 사용자 를 선택합니다.
3단계: 레시피 이름 지정
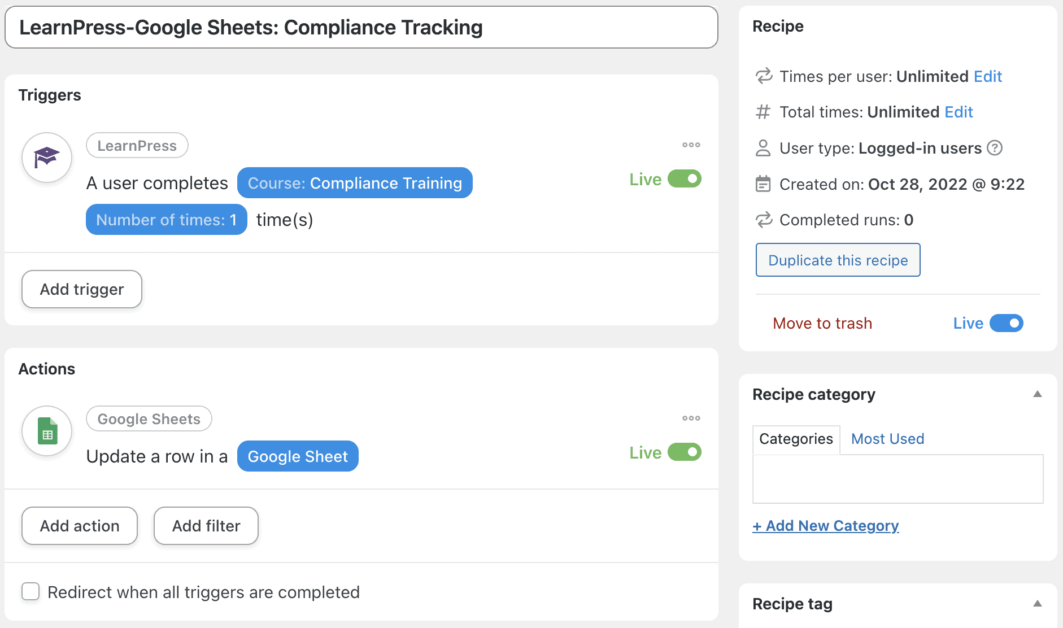
명명 규칙을 준수하기 위해 이 레시피 를 LearnPress-Google 스프레드시트: 규정 준수 추적 이라고 합니다.
4단계: 트리거 구성
트리거 패널에서 LearnPress 를 클릭하고 A user completes a course 를 선택합니다.

Automator는 코스를 선택하라는 메시지를 표시합니다. 규정 준수 교육 과정을 선택했습니다.

과정을 선택한 후 저장 을 클릭합니다. 트리거는 다음과 같아야 합니다.

5단계: 작업 구성
액션 패널에서 액션 추가 를 클릭합니다. 사용 가능한 통합 메뉴에서 클릭
Google Sheets 또는 선호하는 데이터베이스.
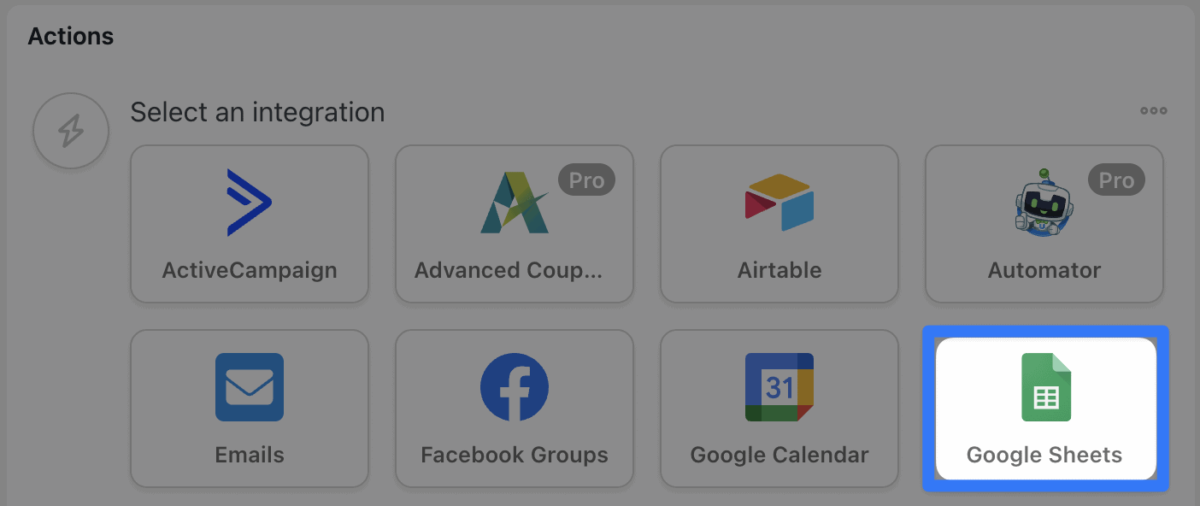
드롭다운 목록 에서 Google 시트에서 행 업데이트 를 선택합니다.

Uncanny Automator는 직원 디렉토리 정보를 저장할 특정 드라이브, 스프레드시트 및 워크시트를 선택하라는 메시지를 표시합니다.
다음 두 필드는 열 검색 필드와 일치 값 필드입니다. 이 두 필드는 Uncanny Automator가 업데이트할 셀 범위를 식별하는 데 사용하는 필드입니다.
열 검색 필드에서 레코드를 업데이트하려는 직원에게 고유한 값이 있는 열을 선택합니다. 예를 들어 직원 디렉터리에서 이메일 열을 선택했습니다.

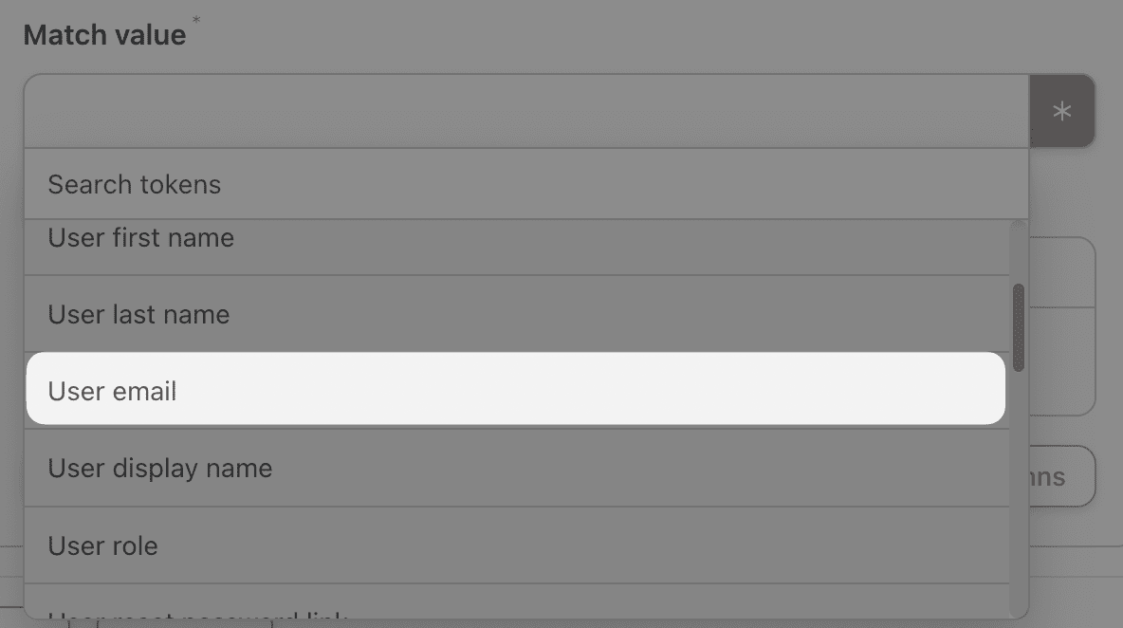
그런 다음 일치 값 필드에서 선택한 열의 값과 일치시킬 고유 식별자를 선택합니다. 이메일 열의 값과 일치하도록 토큰 (웹 사이트 및 통합에서 가져온 동적 데이터) 사용자 이메일 을 선택했습니다.
이렇게 하려면 일치 값 필드(토큰 아이콘)에서 별표 를 클릭하고 사용자 이메일 을 선택합니다.
마지막으로 직원 디렉터리에서 업데이트하려는 특정 셀을 선택할 수 있습니다. 행 레이블이 지정된 필드 아래에서 열 가져오기를 클릭합니다. Automator는 직원 디렉토리에서 열 제목을 검색하고 필드를 채웁니다.

업데이트 버튼을 토글하여 업데이트할 값을 선택합니다. 규정 준수 열을 선택하고 직원이 규정 준수 교육 과정을 완료했음을 나타내는 값을 입력합니다.
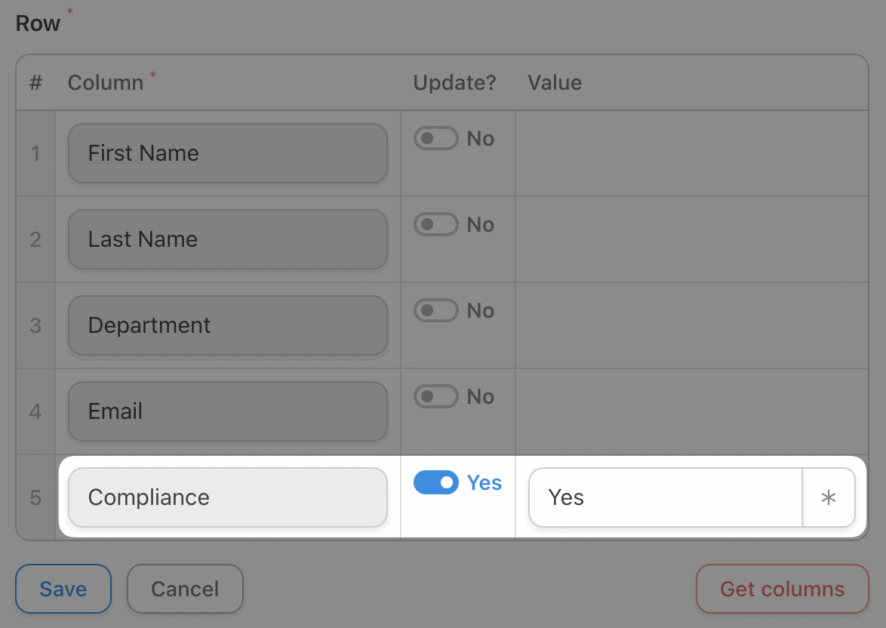
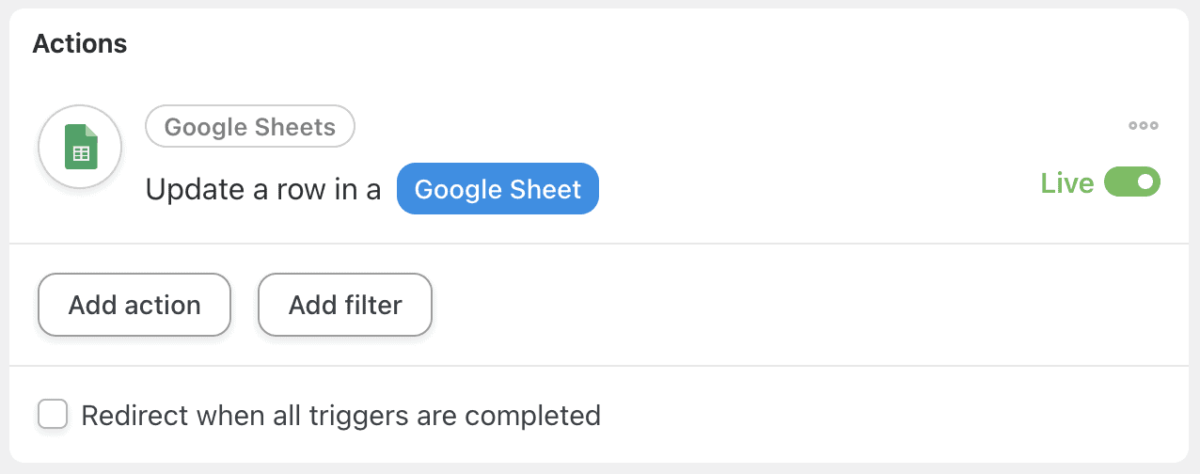
완료되면 저장 을 클릭합니다. 작업은 다음과 같아야 합니다.
6단계: 실행하고 규정 준수를 유지하십시오!
Draft 에서 Live 로 레시피를 전환합니다.
7단계: 전문가처럼 자동화
이제 간단한 자동화에 익숙해졌으므로 고급 과정을 시작할 준비가 되었습니다. Automator가 공식 기록을 업데이트하기 전에 규정 준수 교육을 검토할 시간을 갖도록 Slack을 통해 HR 팀에 알리는 지연 및 다른 작업을 추가합니다.
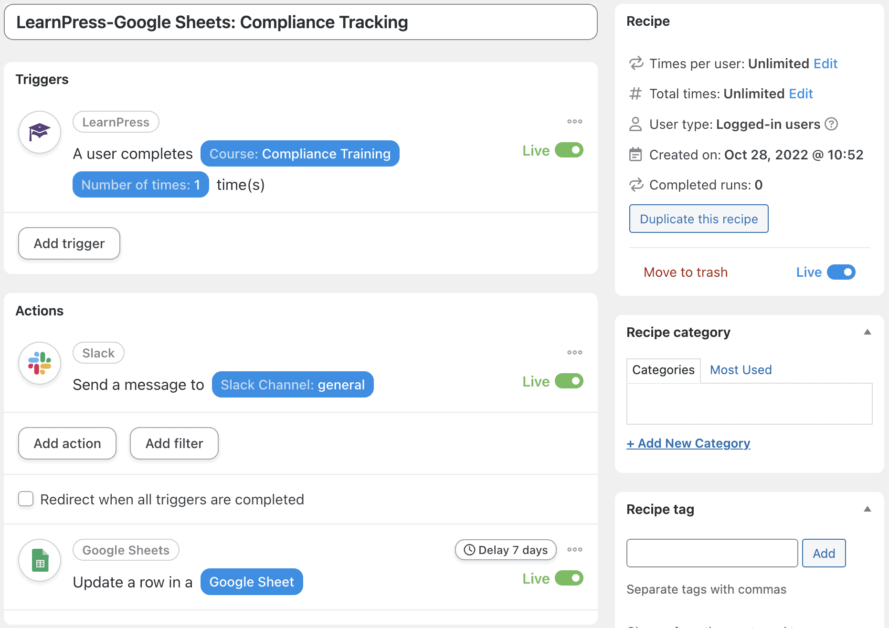
모든 종류의 필터, 토큰 및 지연을 사용하여 Automator를 작업 흐름에 매끄럽게 맞추고 완전히 새로운 것을 만들 수 있습니다.
Uncanny Automator: 지속적인 교육 및 자동화
옛날 옛적에 태양열 계산기는 교실 기술의 최첨단이었습니다. 오늘은 Uncanny Automator와 LearnPress입니다.
우리는 교육(및 자동화)이 계속되어야 한다고 믿습니다. 미래의 교실에서 보고 싶은 e-러닝 자동화가 무엇인지 알려주세요.
더 읽어보기: 메뉴에 WPML 언어 전환기를 추가하고 2023년에 필요한 새로운 언어를 얻으세요
저희에게 연락하십시오, ThimPress:
홈페이지 : https://thimpress.com/
팬페이지 : https://www.facebook.com/ThimPress
유튜브 : https://www.youtube.com/c/ThimPressDesign
트위터 : https://twitter.com/thimpress
